How to Use a Foodsaver Vacuum Sealer in 10 Easy Steps
Choose the right bag size with extra space for sealing, and prepare your food by drying or pre-freezing moist items. This helps ensure a strong seal and keeps your food fresh longer.
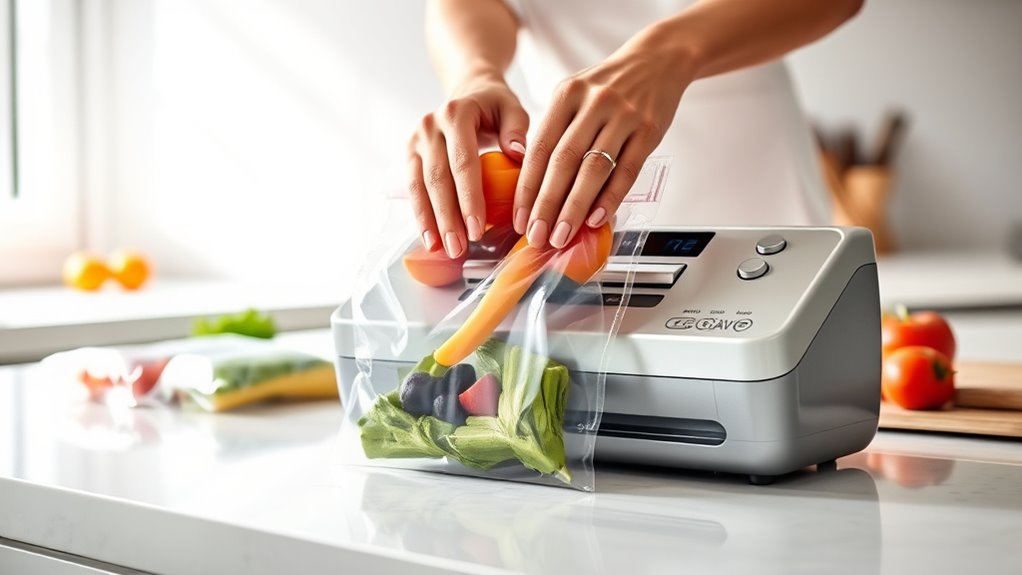
Place the bag flat and wrinkle-free along the sealing strip, then close and latch the lid securely. Make sure everything is lined up properly before moving on.
Press both vacuum and seal buttons to start, and wait for the cycle to finish before opening the lid. It’s important to be patient here so the vacuum sealer can do its job well.
Check the seal carefully once it’s done. If you notice any air leaks, reseal the bag for better preservation.
Also, manage liquids wisely to prevent messes inside the machine.
Don’t forget to clean the drip tray regularly to keep your Foodsaver vacuum sealer working smoothly. Following these simple steps guarantees fresh food and proper sealing every time.
Want even better results? Explore further tips to master your vacuum sealing!
Key Takeaways
- Choose the right bag size with at least 3 inches of extra space above the food for a proper seal. This helps avoid wrinkles or leaks.
- Position the bag flat and straight across the sealing strip. Make sure to wipe the edge dry and keep it taut but not overstretched.
- Close and latch the lid securely. Then, press both buttons simultaneously to start vacuuming and sealing.
- Wait for the machine to complete the cycle and the motor to stop before opening the lid. This ensures a strong seal every time.
- Clean the drip tray and gasket regularly. Also, give the machine at least 20 seconds between seals to prevent overheating and keep it working well.
Choose the Right FoodSaver Bag Size for Your Food
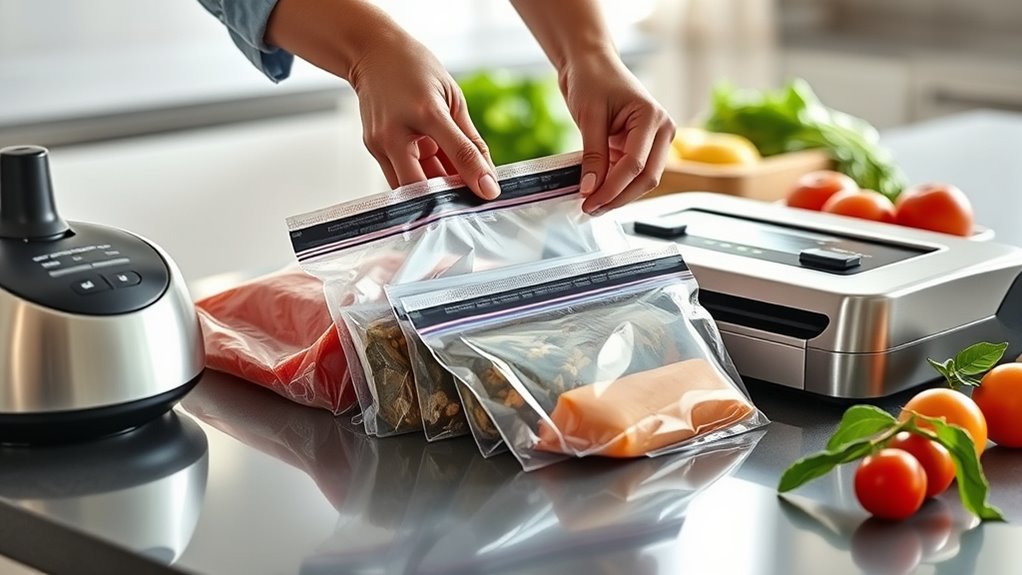
When choosing a FoodSaver bag, make sure to pick a size that leaves at least 3 inches of extra space beyond your food. This extra space is essential for achieving a proper seal.
If the bag is too small, you risk wrinkling or incomplete sealing, which can compromise freshness. For smaller items like cheesecake slices, opt for smaller bags to reduce waste and make sealing easier.
Larger foods need a bigger bag that comfortably fits the item with room to spare. Always leave at least 3 inches of open space at the top of the bag before sealing to guarantee the vacuum sealer can create an airtight seal.
When resealing, keep the bag flat and wrinkle-free to maintain seal integrity. By selecting the right bag size, you’ll avoid leaks and keep your food fresh longer, giving you the best results from your FoodSaver.
Prepare Your Food Properly Before Sealing

Before sealing, make sure your food is clean and dry to avoid sealing problems. For juicy items, freezing them first helps control liquids and guarantees a better seal.
Also, portion your food properly to fit the bag and prevent crushing delicate items. It just makes the whole process smoother and your food stays in great shape.
Choosing Suitable Foods
How do you guarantee your food stays fresh and well-preserved with a Foodsaver vacuum sealer? Start by selecting fresh, high-quality foods and cleaning them thoroughly. Cutting your food into appropriate sizes helps, making sure to leave at least 3 inches of space at the top of the bag for proper sealing.
This space is essential to ensure a tight seal and prevent leaks. For juicy or wet foods, you might want to pre-freeze or blanch them to minimize liquid during sealing. Also, choose the right vacuum setting—dry or moist—based on your food type to optimize the seal.
Before sealing, remove excess air from the bag and flatten it out. These steps help maintain freshness and extend your food’s shelf life effectively. It’s pretty simple once you get the hang of it!
Managing Liquids Effectively
Why does managing liquids effectively matter when using your Foodsaver vacuum sealer? Liquids can spill or get sucked into the machine, preventing a proper seal and causing messes.
To avoid this, always pre-freeze liquids in the bag upright before sealing. This solidifies the contents, making it easier to vacuum without leaks.
For broths or sauces, consider freezing them in small portions or ice cubes to simplify sealing. Soft foods with high moisture, like cheesecake, also benefit from partial freezing to keep their shape and reduce liquid release.
Don’t forget to clean the drip tray regularly since accumulated juices can interfere with sealing. If you’re sealing very wet foods, pre-freezing or using a chamber vacuum sealer helps contain liquids and guarantees a strong, reliable seal every time.
Portioning And Freezing Tips
When you portion your food correctly and freeze it properly, you’ll make sealing easier and keep your meals fresher longer. Start by dividing your food into individual or meal-sized portions using small bags.
For soft foods like cheesecake, seal immediately after the initial seal to maintain shape and avoid smushing. Freeze liquids upright in the bag before you seal to prevent spills and leaks.
Blanch vegetables before sealing to preserve flavor and texture. If you have leftover soft or moist foods, reseal the opened bags promptly to stop spoilage and maintain freshness.
Proper portioning and careful freezing prep will help you get the most out of your Foodsaver vacuum sealer while avoiding messes and wasted food. It really makes a difference!
Position the Bag Correctly in Your FoodSaver

Before sealing, make sure you position the bag correctly in your FoodSaver to guarantee an airtight seal. Place the open end flat and straight across the sealing strip, making sure it’s free of wrinkles or folds.
The bag must be centered within the sealing area to avoid uneven sealing or leaks. Also, leave at least 3 inches of space between the food and the bag’s top edge to allow for a proper seal.
Don’t forget to remove any excess moisture from the edge to help the seal hold tight. Position the bag taut but not overly stretched, so you prevent wrinkles that could compromise the seal.
| Step | What to Do | Why It Matters |
|---|---|---|
| Place Bag Flat | Lay the bag edge straight | Avoid wrinkles for a clean seal |
| Center Bag | Align in sealing area | Prevent uneven sealing |
| Leave Space | Keep 3 inches from food | Ensure enough sealing area |
| Remove Moisture | Wipe bag edge dry | Promote strong seal |
Close the Lid and Secure the Side Latch
Before sealing, make sure the lid is properly aligned with the vacuum sealer body. Move the side latch to the “operate” position and press down firmly until the lid clicks into place.
Then lock the latch to keep the lid secure during sealing. This way, you know everything stays put while the vacuum does its job.
Proper Latch Positioning
Although it might seem simple, properly closing the lid and securing the side latch is essential to get a perfect seal with your Foodsaver vacuum sealer.
First, make sure you align the lid correctly with the machine and close it firmly until you hear a click. Then, move the side latch to the “closed” position to secure the lid.
This step ensures the sealing strip is evenly compressed and seated correctly within the latch, which is key to a good seal.
Before starting the vacuum process, double-check that the latch is fully engaged. Doing this will help you avoid leaks and make sure your bags seal properly next time.
It saves you time and helps preserve your food efficiently.
Lid Alignment Tips
Getting the lid properly aligned with the sealing strip is key to creating an even seal and preventing air leaks. When closing the lid, make sure it sits flush against the machine so the sealing strip makes full contact.
The sealing area needs to be big enough to cover the entire bag opening for a reliable vacuum. After closing the lid, move the side latch to the “operate” position to lock it securely in place.
Double-check the lid is fully closed and latched before starting the vacuum and seal process. Proper alignment and a secure latch guarantee the vacuum sealer works effectively and prevents malfunctions.
Taking these steps will help you get consistent, airtight seals every time. It’s really about being careful and making sure everything fits just right.
Securing For Sealing
Once you close the lid securely, you’ll need to move the side latch to the “operate” position to lock it firmly in place. This step is essential because it keeps the lid from opening during the vacuum process, ensuring an airtight seal.
Before locking the latch, double-check that the sealing strip is properly aligned and free of debris—this guarantees the best seal possible. Locking the latch maintains the necessary pressure inside the machine, so the vacuum and sealing cycle can work efficiently.
Don’t try to open the lid until the cycle is complete; releasing the latch too early can compromise the seal or cause damage. Following these steps will help you get consistent, airtight seals every time.
Press the Vacuum and Seal Buttons to Start
How do you start sealing your food with a Foodsaver vacuum sealer? Once you’ve placed the bag properly in the sealer and made sure it’s flat, press the vacuum and seal buttons at the same time. This action kicks off the sealing process efficiently.
The vacuum will begin removing air from the bag, creating a tight seal around your food. Make sure the bag is positioned correctly to avoid any leaks or incomplete seals.
The machine handles the rest, taking just a few seconds to vacuum the air and then seal the bag securely. Don’t open the lid prematurely—waiting for the machine to finish and stop automatically ensures the best seal and prevents any disruption.
Pressing both buttons simultaneously is all it takes to get your food sealed and preserved quickly and effectively. Easy, right?
Wait for the Machine to Finish Automatically
Once you start the vacuum sealing process, the machine will automatically stop when it reaches the right pressure to secure the seal. Keep an eye on the progress, but don’t interrupt the cycle to avoid damaging the bag or food.
Wait until the lid releases before opening. This way, you can be sure the seal is complete. Just be patient and let the machine do its job!
Automatic Stop Function
Although it might be tempting to open the lid early, you should wait for the FoodSaver vacuum sealer to finish its cycle and stop automatically. This automatic stop function guarantees the sealing and vacuuming processes complete fully, giving you consistent, airtight seals every time.
When the machine finishes, the motor stops running, signaling it’s safe to open the lid and remove your bag. Waiting prevents incomplete seals or bag damage caused by opening too soon.
The automatic stop also protects delicate foods from being crushed by over-vacuuming. By letting the FoodSaver do its job without interruption, you get a perfect seal that keeps your food fresh longer.
Monitoring Sealing Progress
Pay close attention to the sounds and operation of your FoodSaver vacuum sealer as it works through the sealing process. You’ll notice the machine changes its sound and slows down once it finishes vacuuming and sealing automatically.
It’s important to wait patiently for this signal before removing the bag. Interrupting the cycle can break the seal or damage the bag, ruining your efforts.
By letting the machine finish completely, you’ll guarantee an airtight seal that locks in freshness and protect delicate foods from being crushed.
You’ll also avoid leaks caused by over-vacuuming and experience reliable, hassle-free food preservation.
Trust the automatic stop feature and enjoy perfectly sealed bags every time without worry or extra effort.
Avoid Interrupting Cycle
While your FoodSaver vacuum sealer is working, don’t open or move it until the cycle finishes automatically. Interrupting the vacuum or sealing process can cause improper sealing or incomplete vacuum, which compromises food preservation.
The sealer is designed to stop on its own when done, so you just need to be patient and let it complete the cycle. Moving or opening it early might also damage the machine or ruin the seal.
Here’s a quick overview of what to do and avoid:
| Action | Effect | Tip |
|---|---|---|
| Wait for automatic stop | Proper vacuum and seal | Be patient |
| Open early | Improper seal | Avoid opening |
| Move the machine | Interrupt cycle | Keep machine steady |
| Interrupt cycle | Potential damage | Let it finish uninterrupted |
| Follow cycle completion | Ideal results | Trust the machine |
Check the Seal to Make Sure It’s Strong
How do you know if your Foodsaver vacuum sealer has created a strong seal? First, check that the bag lies flat and is properly aligned in the sealing area. Wrinkles or folds can weaken the seal, so smooth out any creases before sealing.
Also, make sure the sealing strip is clean and free of debris to avoid weak spots. Leave at least 3 inches of space above the food, especially if it’s moist or juicy, to guarantee a proper seal. Press the seal button firmly and hold it until the seal indicator confirms completion.
To feel confident about your seal, remember:
- Your food stays fresh longer without leaks or spoilage.
- You avoid frustrating reseals and wasted bags.
- Your meals stay safe from freezer burn and contamination.
- You save money by preserving food quality effectively.
Checking the seal thoroughly guarantees your vacuum sealer works perfectly every time. It’s a simple step that makes a big difference!
Troubleshoot Common Sealing Problems
If your Foodsaver vacuum sealer isn’t creating a proper seal, you’ll want to check a few key factors that commonly cause problems. First, make sure the bag is flat and properly positioned within the sealing strip—wrinkles or folds can cause leaks.
Avoid overfilling the bag; leave at least 3 inches of space at the top for a secure seal. Next, clean the gasket regularly to remove food residue or debris that might block the seal.
If you’re sealing moist foods, use the moist setting to improve seal integrity and prevent leaks. Also, give the machine at least 20 seconds to cool between sealing attempts—overheating can cause sealing issues.
Manage Liquids and Soft Foods for Clean Sealing
Why do liquids and soft foods often complicate vacuum sealing? Liquids can escape and interfere with the sealing process, while soft foods release moisture that can cause leaks or weak seals.
To tackle this, you can freeze liquids or partially freeze soft foods before sealing. This step solidifies moisture, making it easier to create a clean seal without mess.
Here’s how to manage these tricky items effectively:
- Freeze liquids upright in the bag first to prevent spills during sealing.
- Use ice cubes of broth or other liquids inside the bag to keep moisture contained.
- Partially freeze soft foods like cheesecake or berries to reduce moisture and improve seal quality.
- For very wet foods, freeze in small portions or consider a chamber vacuum sealer for better results.
These simple tips help you seal liquids and soft foods cleanly, keeping your vacuum bags intact and your kitchen mess-free.
Clean the Drip Tray and Gasket, Then Store Food Safely
After managing liquids and soft foods to guarantee a clean seal, it’s important to keep your vacuum sealer in top shape by regularly cleaning the drip tray and gasket. First, unplug the machine and remove the drip tray. Wash it with warm, soapy water, dry thoroughly, then reinsert.
Regularly clean your vacuum sealer’s drip tray and gasket to maintain a perfect seal and optimal performance.
Next, gently remove the gasket from the lid, clean it with a warm, soapy cloth, and dry it fully before reattaching. This prevents residue buildup that can affect sealing.
When storing food, use properly sealed bags with at least 3 inches of space at the top. Flatten bags and smooth out wrinkles before sealing.
Always wait 20 seconds after sealing to let the machine cool. This helps avoid overheating and ensures safe storage.
Frequently Asked Questions
How Do I Operate My Foodsaver Vacuum Sealer?
You place the bag open end flat inside, close the lid, and latch it. Then, press vacuum and seal.
Wait for it to finish before opening. For moist foods, seal after vacuuming to avoid leaks.
What Are Common Vacuum Sealing Mistakes?
Think of sealing like packing a suitcase—you wouldn’t stuff it to bursting or forget to zip it properly.
You’ll avoid common mistakes by leaving space, cleaning seals, not overfilling, and letting the machine cool between uses.
Can I Use Regular Ziploc Bags in a Vacuum Sealer?
You shouldn’t use regular Ziploc bags in a vacuum sealer because they’re not designed for airtight sealing.
Instead, use FoodSaver-compatible vacuum sealer bags to avoid leaks, damage, and guarantee your food stays fresh longer.
How to Use a Vacuum Sealer Step by Step?
You slide your bag’s open end into the sealer, like fitting a puzzle piece. Close the lid, latch it, then press vacuum-seal.
Wait a moment, then lift the lid and remove your airtight, fresh-sealed bag. It’s really that simple!
Conclusion
Now that you’ve got the hang of using your FoodSaver vacuum sealer, you’re ready to keep your food fresh as a daisy and save money by reducing waste.
Just remember to pick the right bag size, prep your food well, and keep your machine clean for the best results.
With these simple steps, sealing your food will be a breeze—making meal prep quicker and your leftovers last longer.
You’ve got this! Using a FoodSaver vacuum sealer not only preserves your food’s freshness but also helps you cut down on spoilage and food waste.
By sealing in flavor and nutrients, you’re making the most of every meal, which means more savings and less stress.
Keep practicing these tips, and soon vacuum sealing will become second nature in your kitchen.