
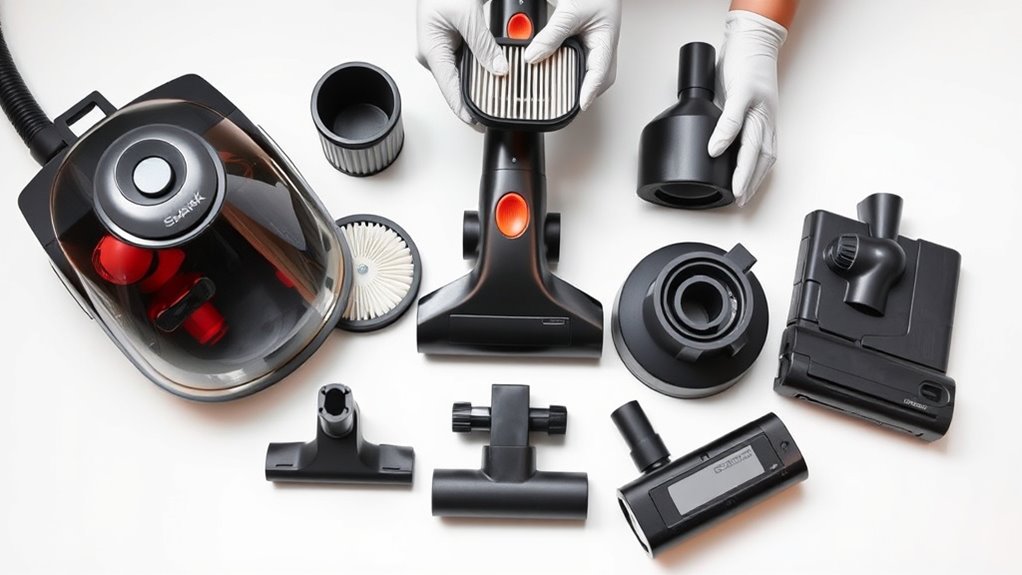
7 Easy Steps to Take Apart a Shark Vacuum and Clean It
To take apart your Shark vacuum in seven easy steps, start by gathering the necessary tools and powering off the unit completely. This ensures safety while you work on your vacuum.
Begin by unscrewing the panels to access the internal parts and get a clear view of what’s inside.
Next, carefully lift out the brush roll and detach the belt. These parts often collect the most dirt and debris, so handling them gently is key.
After that, disconnect the wiring to remove the motor.
Take your time inspecting and cleaning each component thoroughly to keep your vacuum running smoothly.
If you notice any worn or damaged parts, replace them before reassembling.
Once you’ve cleaned everything, put all the pieces back together securely.
Finally, test the vacuum to guarantee it’s working properly.
Keep following these steps to master a complete and safe cleaning process every time.
Key Takeaways
- Power off and unplug the Shark vacuum before beginning disassembly to ensure safety. This step is super important to avoid any accidents while you’re working on it.
- Remove visible screws and gently pry panels with plastic tools to access internal components. Take your time here so you don’t damage anything.
- Detach the brush roll by unscrewing side screws and carefully removing the belt and brush. Be gentle when handling these parts to keep them in good shape.
- Clean or replace the brush roll, motor, filters, and internal parts to maintain vacuum performance. Keeping these components fresh really helps your vacuum work like new.
- Reassemble all parts securely, reconnect wires correctly, and test the vacuum for proper operation. Make sure everything is tight and connected before you plug it back in.
How to Disassemble Your Shark Vacuum: Quick Overview

Before you begin, make sure you have the right tools like a Phillips screwdriver and security bits. To disassemble your Shark vacuum, start by removing screws located under the wheels and on the front plate using these tools.
Once the screws are out, carefully pry off the main unit’s casing. Be cautious to disconnect any wires connected to switches or internal components as you do this.
Next, lift out the brush roll and remove any screws that secure the motor and circuit board. This will give you better access to the internal parts.
When disconnecting wiring, remove screws holding wire guards and gently pull on cords to expose and detach wires safely. Use needle-nose pliers and screwdrivers to access and remove internal parts like switches, faceplates, and mechanisms.
Following these steps helps you disassemble the vacuum efficiently and prepares it for thorough cleaning or repair. Easy, right? Just take it slow and you’ll have it apart in no time!
Prepare Tools and Workspace for Disassembly

Before you start, make sure you have the right tools like star-shaped security bits, Phillips and flathead screwdrivers, and needle-nose pliers within reach.
Set up a clean, organized workspace with enough room to lay out parts as you remove them. Don’t forget to unplug the vacuum to keep things safe while you work.
It’s always better to be prepared so you don’t have to stop halfway looking for something. Plus, a tidy space makes everything easier to find and keeps your parts safe.
Essential Tools Needed
When you’re ready to take apart your Shark vacuum, gather the right tools to make the process smooth and safe. Having the proper tools guarantees you won’t damage any parts or lose small screws along the way.
Here are the essential tools you’ll need:
- Security bits (star-shaped with a hole) for precision screws
- Phillips screwdriver for front plate and internal screws
- Flathead screwdriver or pry tools for gently unhooking parts
- Needle-nose pliers to disconnect brush roll motor contacts and handle wiring
- Container to keep screws and small parts organized
With these tools in hand, you’ll be prepared to disassemble your vacuum efficiently. This way, you minimize the risk of damage or lost components during cleaning.
Organizing Workspace Efficiently
Although gathering your tools is essential, organizing your workspace efficiently guarantees you won’t lose screws or damage parts during disassembly.
Start by clearing a spacious, well-lit area where you can comfortably work. Use small containers or magnetic trays to keep screws and tiny components organized and easy to find.
Lay out a clean cloth or mat to place disassembled parts on, preventing scratches or loss. Before you begin, review a disassembly guide or video to familiarize yourself with the steps and tools required.
Having all tools—like security bits, Phillips screwdrivers, and needle-nose pliers—within reach helps maintain your workflow.
Remove Screws and Panels to Access Internals

Since gaining full access to your Shark vacuum’s internals requires removing several panels, start by using a Phillips screwdriver to take out all visible screws along the front and rear.
After removing these screws, carefully check for hidden ones by running your finger along the edges. Removing all screws ensures the panels come off smoothly without damage.
Use a plastic pry tool to gently lift the panels, being cautious of any wires connected to switches. Don’t forget to remove the screws securing the wire guard and disconnect wires where necessary to safely access internal parts.
Remember these key points:
- Use a Phillips screwdriver for all screws
- Probe edges to find hidden screws
- Pry panels gently with a plastic tool
- Avoid damaging wires connected to switches
- Flip or unhook panels for better access
Following these steps will let you comfortably reach the motor, circuit board, and other internals for cleaning or repair. Easy, right? Just take your time and be gentle!
Lift Out the Brush Roll and Detach the Belt
Before you remove the brush roll, make sure the vacuum is unplugged and powered off to keep yourself safe. Start by locating the slots on either side of the vacuum where the brush roll fits.
For newer Shark models, you’ll need to unscrew the side screws holding the brush roll in place before lifting it out gently. Once you’ve freed the brush roll, carefully detach the belt from both the motor pulley and the brush roll itself.
This step requires patience to avoid damaging the belt or components. If your model has brush roll motor contacts attached, use needle-nose pliers to carefully disconnect them.
Taking your time to detach these parts properly will guarantee they stay in good condition and make reassembly easier. Now that the brush roll and belt are removed, you’re ready to move on to the next cleaning step.
Disconnect Wiring and Remove Shark Vacuum Motor
Once you’ve removed the brush roll and belt, start by unscrewing the wire guard to access the internal wiring. Gently pull on the cord to expose the wires, then carefully cut the wires involved in the connection, usually at the furthest point from the motor.
After removing the brush roll and belt, unscrew the wire guard to expose and cut the motor wires carefully.
When disconnecting the motor, detach the wires from the terminals, noting their exact positions for easy reassembly. Use needle-nose pliers to safely remove wiring from the motor contacts without causing damage.
Here are key points to keep in mind:
- Remove screws securing the wire guard before accessing wiring
- Cut only the two wires involved in the motor connection
- Note wire positions to avoid confusion later
- Use needle-nose pliers to disconnect wires carefully
- Make certain wires are properly aligned during reassembly
Clean, Inspect, and Identify Worn Parts
To properly clean and maintain your Shark vacuum, start by carefully removing the HEPA filter cover and dowel to access the internal components. Once exposed, inspect the brush roll closely for debris, hair, or signs of wear.
Remove it if necessary to clean thoroughly or prepare for replacement. Next, inspect the circuit board and motor for dust buildup, corrosion, or any visible damage that could affect performance.
Don’t forget to examine the internal wiring for loose connections, frayed wires, or broken insulation, as these issues can cause malfunctions. As you clean and inspect, identify any worn or damaged parts such as belts, filters, or seals.
Recognizing these early helps you decide what needs replacing later. Taking these steps guarantees your vacuum stays in good working order and helps prevent unexpected breakdowns.
Keep your vacuum’s internal parts clean and well-maintained for peak performance.
Replace Parts, Reassemble Shark Vacuum, and Test
After identifying worn parts, carefully replace them with new components to assure your Shark vacuum runs efficiently. When you reassemble the vacuum, start by reconnecting all wires to their original terminals, making certain each is properly aligned and secure.
Next, reinstall the switch and faceplate by pressing them firmly until you hear the tabs click into place. Follow the disassembly steps in reverse order, moving from internal components outward to the exterior panels.
Before finishing, double-check that all screws—including hidden and rear ones—are tightened to maintain stability. Finally, test your vacuum by plugging it in and running it to confirm everything works correctly.
Keep these key points in mind when you reassemble your Shark vacuum:
- Reconnect wires carefully and securely
- Press switch and faceplate until they click
- Reverse disassembly steps methodically
- Tighten all screws properly
- Test vacuum operation after reassembly
This ensures your Shark vacuum runs smoothly and reliably.
Frequently Asked Questions
Can I Take My Shark Vacuum Apart to Clean?
Yes, you can take your Shark vacuum apart to clean it. Just be sure to follow guides carefully.
Remove screws and panels safely, and disconnect wiring properly to avoid damage. This way, you can access internal parts like filters and brush rolls without any issues.
How Do I Clean the Inside of My Shark Vacuum?
Did you know clogged vacuums lose up to 50% suction? You’ll want to remove the brush roll and clear debris from hoses.
Also, don’t forget to clean the HEPA filter. Wipe the motor housing with a soft cloth to keep it running smoothly.
How Do I Take Apart the Bottom of My Shark Vacuum?
You’ll need to remove the screws under the wheels with a flathead screwdriver. Then, carefully pry off the bottom plate.
Make sure to check for any hidden screws as you go. Also, watch out for clips or wires that might be connected before you fully remove it.
How Do I Open My Shark Vacuum Cleaner?
You’ll start by removing all visible screws, including those hidden under the wheels. Then, carefully pry off the main panels using a plastic tool.
After that, disconnect wiring connectors, and unhook the bottom plate to fully open your Shark vacuum. It’s a bit tricky, but take your time and be gentle with the parts.
Conclusion
Taking apart your Shark vacuum is like peeling back the layers of an onion—each step gets you closer to the core. By carefully following these simple steps, you’ll clean and inspect your vacuum, ensuring it runs smoothly and lasts longer.
With a little patience and attention, you’ll replace worn parts, reassemble everything, and get your vacuum humming like new again. You’ve got this—your Shark will thank you!
Cleaning your Shark vacuum regularly helps maintain its powerful suction and extends its lifespan. By taking the time to disassemble and clean it properly, you prevent clogs and buildup that can reduce efficiency.
So, roll up your sleeves and dive into these 7 easy steps to take apart a Shark vacuum and clean it. Your vacuum will perform better, last longer, and keep your home spotless!



One Comment